Ready to Wave Goodbye to Backend Blues? 🚀 Introducing Appwrite!
A beginners walk through to Appwrite


Introduction
Ah, the joys of backend development – said no developer ever!
Have you spent endless nights wrestling with databases, authentication, server setups, and whatnot, just to find yourself still working on the login page only? Well, we all have been there. We all have worked on authentications, databases, and server setups, tried building secure and powerful APIs, and ended up with a big imposter syndrome.
If all that sounds like you, let me introduce you to Appwrite, an Open Source Backend as a Service for Web, Mobile, and Flutter applications. And even if you're new in the world of backend development, bear with me. I'll show you how Appwrite can help you build a secure and powerful backend for your next project in no time.
What is Backend as a Service (BaaS)?

It's nothing but what the name suggests. Literally, some secure, reusable, and scalable backend code is already written for you to use. You don't have to worry about setting up servers, databases, or authentication. You don't have to worry about security, scalability, performance, or anything. Just use the code and focus on what matters most as a programmer - touching the grass.
Nerds describe it as:
Backend as a Service (BaaS), also known as Mobile Backend as a Service (MBaaS), is a cloud computing service that provides developers with a way to connect their applications to backend cloud storage and APIs exposed by back-end applications while also providing features such as User Management, Realtime Notifications, Integration with OAuth providers, and etc.
What is Appwrite?

Appwrite is an Open Source BaaS that abstracts and simplifies common development tasks behind REST APIs, to help you develop your apps faster and more securely. It's a complete package that includes everything you need to build a backend for your next project, including Authentication, Databases, Cloud Functions, Storage, and many more. It's a one-stop solution for all your backend needs.
Why Appwrite?
Appwrite is easy to use, secure, and scalable. And most importantly, it's Open Source and free. And who doesn't like free stuff?
What can you do with Appwrite? Well, pretty much everything. Everything you need to get started. I mean it. Everything. From Authentication to Databases, from Cloud Functions to Storage; you name it.
Getting Started
Enough talking. Let's get our hands dirty. In this tutorial, we'll not build anything, but I'll show some examples of how you can use Appwrite to build your next project.
Speaking of Appwrite, we have two options to get started. You can either use the Appwrite Cloud, or you can host it yourself. If you're just trying out Appwrite, I recommend using the Appwrite Cloud. It's free and easy to get it running. In this tutorial, we'll use the Appwrite Cloud. But if you want to host it yourself, you can head over to the official documentation anytime.
Creating a Project
Let's just follow some steps and get our project up and running asap.
Head over to the Appwrite Dashboard and Sign Up for a new account.
Once you're logged in, click on the Create Project button, give it a name, and start a new project.
Now, you'll be redirected to your project dashboard. Here you can choose where you're going to use Appwrite. You can choose from Web App, Flutter App, Apple App, or Android App. For this tutorial, we'll go with Web App.
Then you'll be asked to Register your Web App with a Name and a Hostname. You can give any name you want (Maybe "My Demo App"), but for the hostname, you have to give the URL of your app. For local development, use
localhostas the hostname. Once you're done, click on the Next button.After that, you can safely click the "Skip optional steps". We don't need them for now.
Well, that's it. You've successfully configured your Appwrite console. Now, let's see how we can use Appwrite in our app.
Using Appwrite in your app
For this tutorial, we'll use the Appwrite JavaScript SDK. You can use the SDK in your app by adding the following script tag on top of your HTML file.
<script defer src="https://cdn.jsdelivr.net/npm/appwrite@10.1.0" />
<script>
Or you can install it using npm. (You'll need Node.js installed on your machine for this)
npm install appwrite
I'll go with the npm option for this tutorial.
So that was all the setup we needed. Now, let's write some actual code.
Configuring the SDK
The first thing we need to do is configure the SDK. We can do that by creating a new instance of the Client class provided by appwrite and passing the project ID and the endpoint URL as parameters.
import { Client, Account } from "appwrite";

const client = new Client();

client
    .setEndpoint('https://cloud.appwrite.io/v1') // Your API Endpoint
    .setProject('5df5acd0d48c2') // Your project ID
;
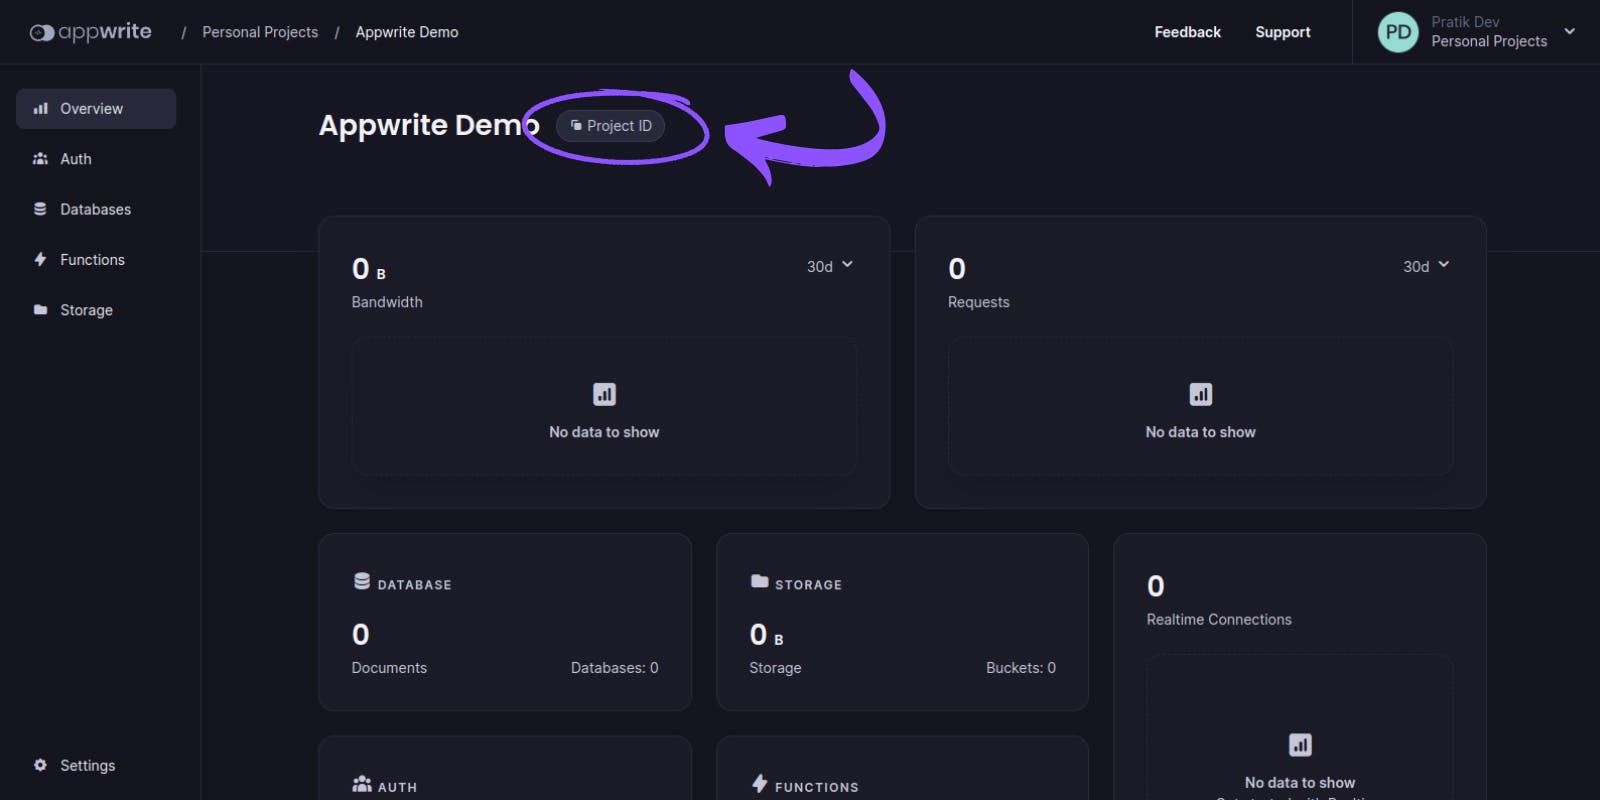
To get your project ID, head over to your project dashboard and click the button shown in the screenshot below to copy your project ID to the clipboard.
Now, let's see how we can use Appwrite to build some cool stuff.
Authentication
Authentication is the first thing any app needs. And Appwrite makes it super easy. Let's see how.
const account = new Account(client);

const promise = account.create('[USER_ID]', 'email@example.com', 'password');

promise.then(function (response) {
    console.log(response); // Success
}, function (error) {
    console.log(error); // Failure
});
That's it. You've successfully created a new user. No need to worry about hashing passwords, storing session tokens, JWT, or anything. Appwrite handles everything for you.
The create method takes three parameters. The first one is the unique user ID. You can use any string you want. But that needs to be unique for each user. The second parameter is the user's email address, and the third parameter is the user's password.
Speaking of unique user IDs, Appwrite knows that it's such a headache to generate unique IDs. So they provided a method to generate it for you. You can use the ID class's unique method to generate unique IDs. Your final code will look something like this.
import { Client, Account, ID } from "appwrite";

const client = new Client();

client
    .setEndpoint('https://cloud.appwrite.io/v1') // Your API Endpoint
    .setProject('5df5acd0d48c2') // Your project ID

const account = new Account(client);

const promise = account.create(ID.unique(), 'email@example.com', 'password');

promise.then(function (response) {
    console.log(response); // Success
}, function (error) {
    console.log(error); // Failure
});
Wanna guess the equivalent code with Express? Well, I don't know either. But asking ChatGPT, I got this.
const express = require('express');
const bodyParser = require('body-parser');
const mysql = require('mysql2/promise');
const bcrypt = require('bcrypt');

const app = express();
app.use(bodyParser.json());

// Create a database connection pool
const pool = mysql.createPool({
  host: 'your_database_host',
  user: 'your_database_user',
  password: 'your_database_password',
  database: 'your_database_name'
});

app.post('/createUser', async (req, res) => {
  try {
    const { email, password } = req.body;

    // Check if email is already in use
    const [existingUser] = await pool.query('SELECT * FROM users WHERE email = ?', [email]);
    if (existingUser.length > 0) {
      return res.status(400).json({ error: 'Email already in use' });
    }

    // Hash the password
    const hashedPassword = await bcrypt.hash(password, 10);

    // Insert the user into the database
    const [result] = await pool.query('INSERT INTO users (email, password) VALUES (?, ?)', [email, hashedPassword]);

    const newUser = {
      id: result.insertId,
      email: email
    };

    return res.status(201).json({ message: 'User created successfully', user: newUser });
  } catch (error) {
    console.error(error);
    return res.status(500).json({ error: 'Internal server error' });
  }
});

const PORT = 3000;
app.listen(PORT, () => {
  console.log(`Server is running on port ${PORT}`);
});
Hmm, looks scary enough 👀 Let's move on.
Databases
Databases are the backbone of any app. And Appwrite provides a simple and easy-to-use database solution. To get started with databases, we need to create a Database from our Appwrite console first.
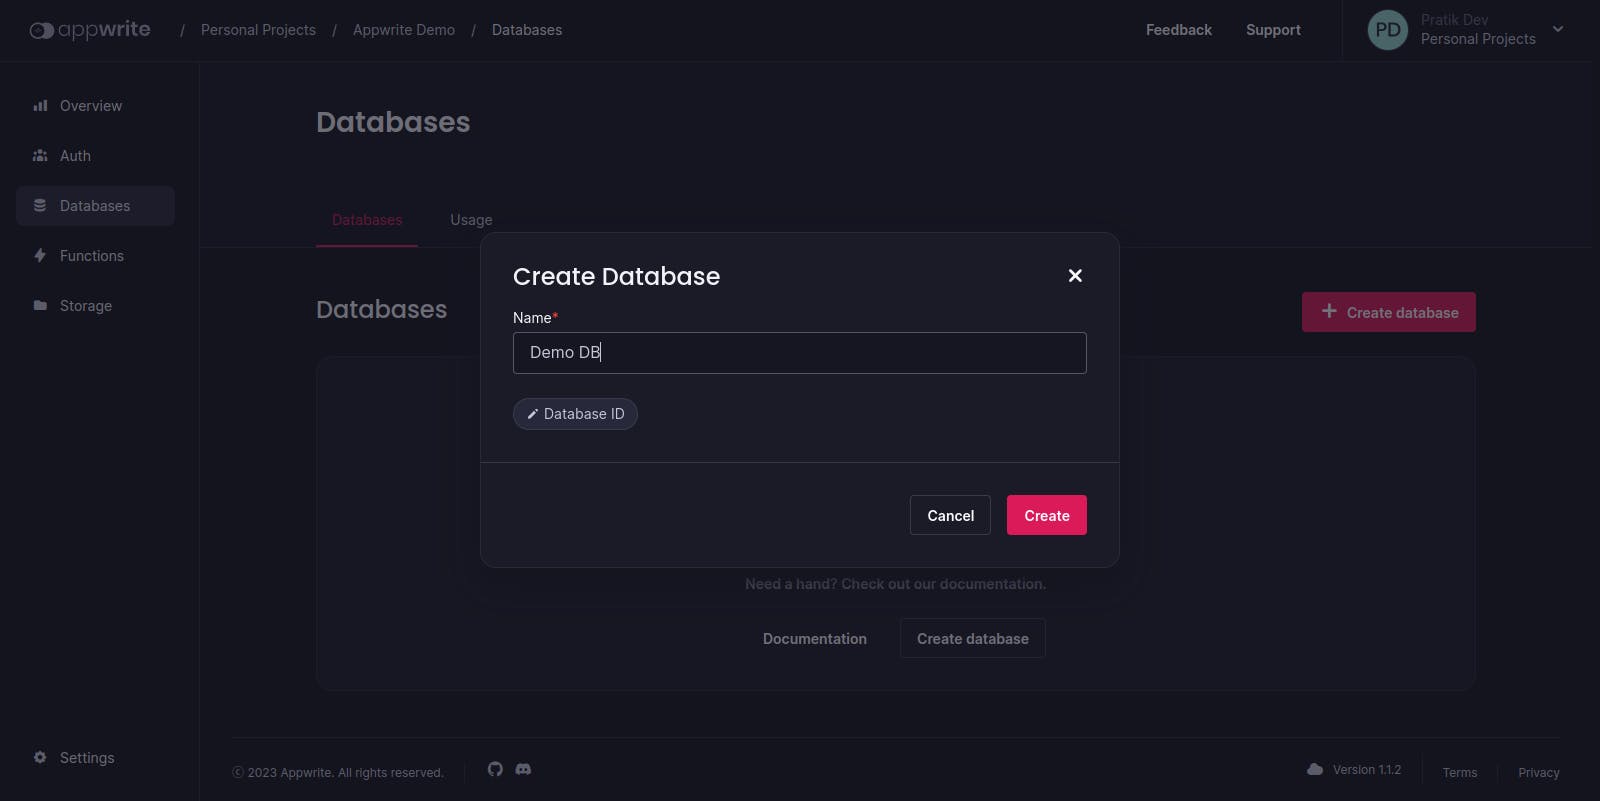
Head over to the Database dashboard from the left panel in your Appwrite console and create a new database by clicking the Create Database button. Give your database a name and create one.
Now, you'll be redirected to your database dashboard. Here you'll need to create a collection. The same procedure again. Click on the Create Collection button, give your collection a name, and create one. Then, you'll be redirected to your collection dashboard. Here you can create, monitor, edit, or delete your documents. Or edit your collection's settings if you want.

For enhanced security, Appwrite requires you to create something called "Attributes" before creating any document. Attributes are nothing but a set of rules that define what data can be stored in a collection.
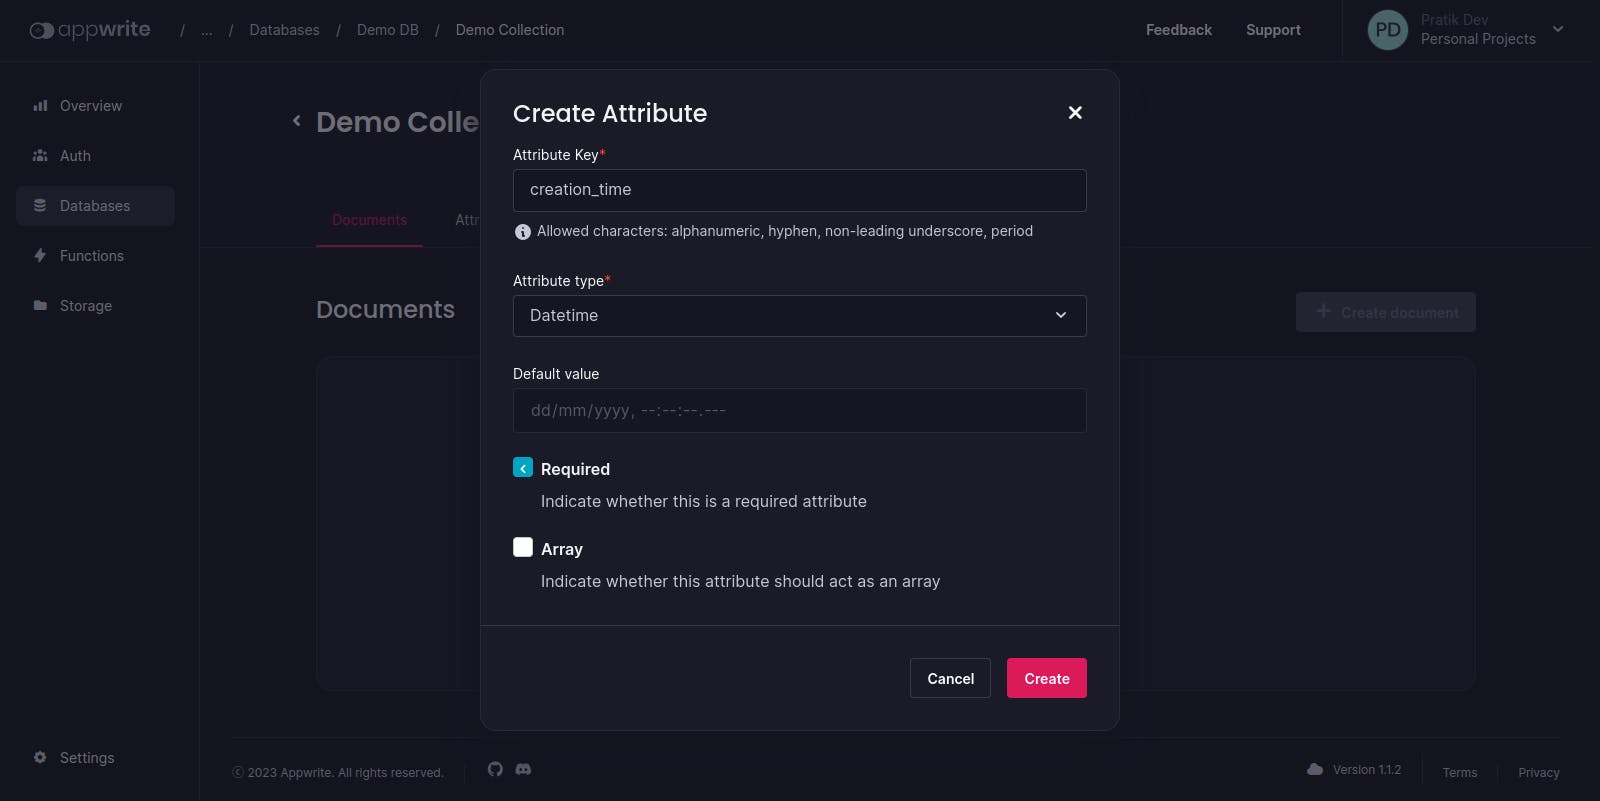
To create attributes, click on the Create Attribute button, give your attribute a name, choose the type of data you want to store, and click on the Create button. You can create as many attributes as you want.
Suppose, for a social media app, you want to store a post's body, creation time, like count, and author's name in your collection. Then you can create attributes like "body" with type String, "creation_time" with type DateTime, "like_count" with type Integer, and "author_name" with type String. You can specify each Attribute's default value, whether it's required or not, and etc.
Now, let's see how we can use Appwrite to create a new document in our collection.
const database = new Database(client);

const dataThatYouWantToStore = {
  body: "A really nice post",
  creation_time: new Date(),
  like_count: 110,
  author_name: "John Doe",
};

const promise = databases.createDocument('[DATABASE_ID]', '[COLLECTION_ID]', '[DOCUMENT_ID]', dataThatYouWantToStore);

promise.then(function (response) {
    console.log(response); // Success
}, function (error) {
    console.log(error); // Failure
});
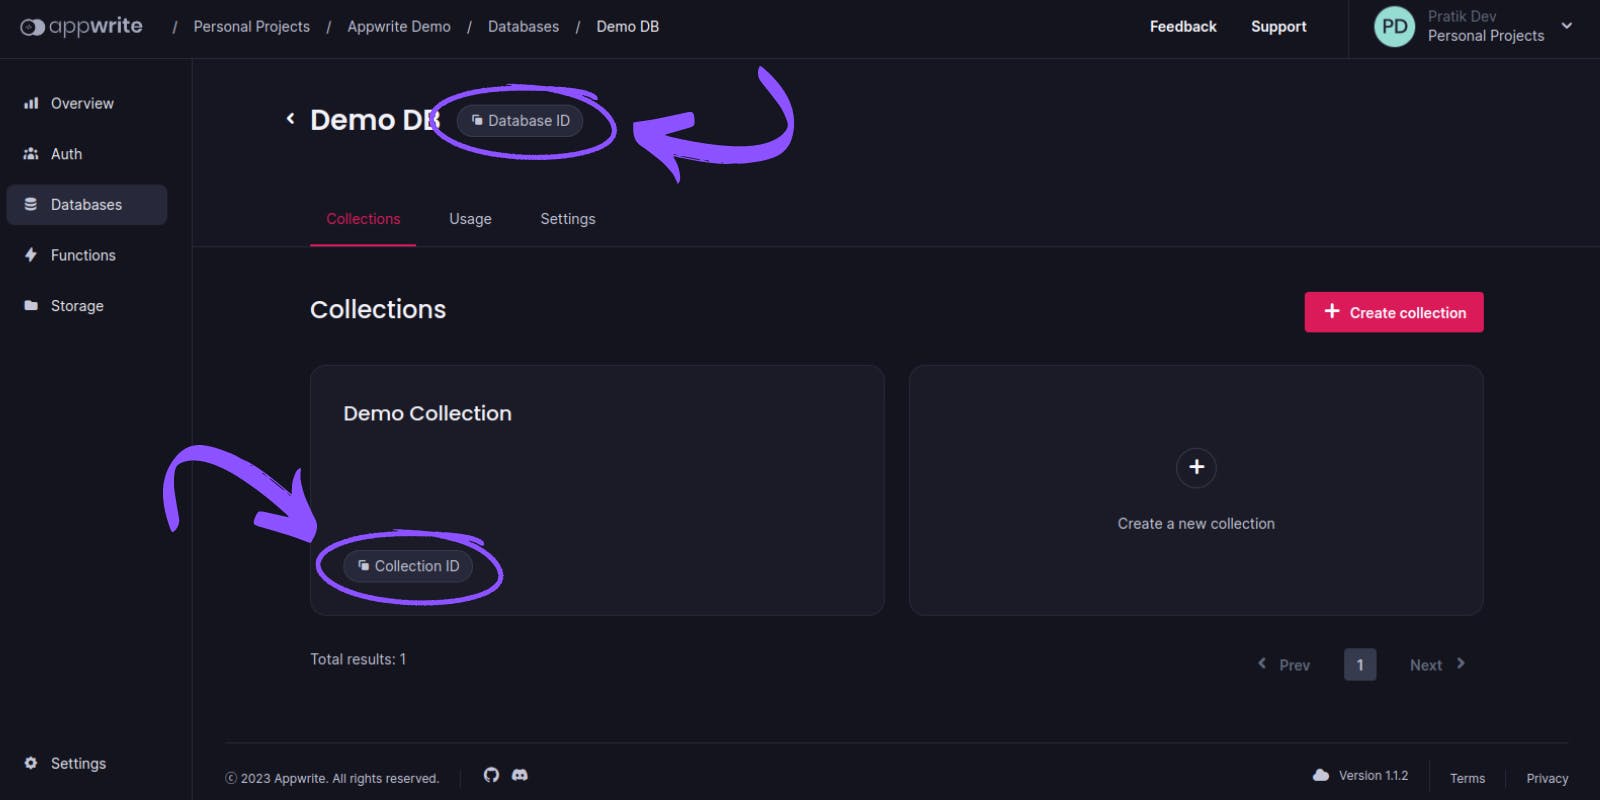
The createDocument method takes four parameters. The first one is the database ID, then the collection ID, a unique document ID, and the data that you want to store in your document respectively. The data should contain the attributes you have created from your Appwrite console previously.
For the database and collection ID, click the "Database ID" and "Collection ID" buttons respectively from your database dashboard to copy them to the clipboard.
Again, for a unique document ID, you can use the ID class's unique method to generate a unique ID. Your final promise will look something like:
const promise = databases.createDocument(
  "[DATABASE_ID]",
  "[COLLECTION_ID]",
  ID.unique(),
  dataThatYouWantToStore
);
And that's it. You've successfully created a new document in your collection. No need to worry about SQL queries, database connections, or anything. Appwrite does all the heavy lifting for you.
Conclusion
Well, that's pretty much it. You've successfully created a new user, and a new document in your collection without writing a single line of backend logic. And that's just the tip of the iceberg. Appwrite has a lot more to offer. You can use Appwrite to create a new user session, upload files, create cloud functions, and many more. You can check out the official documentation to learn more about Appwrite.
I hope you enjoyed this tutorial. If you have any questions, feel free to ask me in the comments below. And if you liked it, let your friends also know about the powers of Appwrite by sharing this blog. Thanks for following along. See you in the next one. 👋